Key Takeaways
- Most wet basement issues start outside the house, so grading, gutters, and downspout extensions should be your first line of defense before any interior sealant goes down
- Hydrostatic pressure from saturated soil can push moisture up through concrete floors even when there are no visible cracks
- Interior sealers and epoxy coatings are affordable DIY options, but they only work on minor seepage and sound concrete
- Exterior excavation and membrane installation offer the strongest long-term protection but come with the highest price tag and disruption
- Interior drain tile paired with a sump pump is often the best middle-ground solution for homes with recurring water intrusion
- Vapor barriers, dehumidifiers, and proper ventilation matter just as much as the floor treatment itself
- Skipping professional diagnosis can waste thousands on the wrong fix, so testing moisture source and volume should always come first
Storm-Ready Basement: How To Waterproof A Basement Floor
Heavy rain hits, the sky opens up, and within hours you are downstairs with a shop vac wondering how water keeps finding its way in. If that scene feels familiar, you are not alone. Basement moisture is one of the most common and most expensive headaches a homeowner can inherit, and it rarely fixes itself.
The tricky part is that there is no single right answer. One house needs nothing more than a tube of hydraulic cement and better gutters. Another needs full exterior excavation. The gap between those two solutions can be tens of thousands of dollars, so understanding which approach fits your situation matters enormously.
This guide weighs the main options side by side, from quick DIY sealers to full-scale drainage systems, so you can decide where your money and effort should actually go. We will compare costs, longevity, difficulty, and the specific water problems each method solves best.
Why Basement Floors Leak In The First Place
Before choosing a solution, you need to understand what you are fighting. Water does not simply “appear” in a basement. It is pushed, pulled, or wicked in by forces that have been working on your foundation since the day it was poured.
The biggest culprit is pressure from saturated soil surrounding your home. Water pooling around and below a house builds hydrostatic pressure against foundation walls and floors, and that pressure will exploit any crack, pore, or cold joint it can find. Concrete looks solid, but it is actually porous enough for moisture to migrate right through it.
Common sources of basement water include:
- Poor exterior grading that slopes toward the house instead of away
- Clogged or undersized gutters overflowing near the foundation
- Downspouts that dump water within a few feet of the walls
- A high local water table that rises after heavy rain
- Cracked or deteriorated foundation walls and floor slabs
- Failed or missing exterior waterproofing membrane
Identifying the actual source matters because sealing a floor will do nothing if the real problem is a downspout emptying two feet from your foundation. Even subtle issues like roof pitch drainage issues can dump hundreds of gallons where they do not belong, overwhelming any interior defense you put in place.
Comparing The Main Waterproofing Approaches
There are essentially four categories of fixes, and they vary wildly in cost and effectiveness. HomeAdvisor reports that homeowners typically spend an average of about $5,240 to seal a basement, with projects commonly ranging from roughly $2,461 to $8,201 depending on scope.
Interior Sealers And Coatings
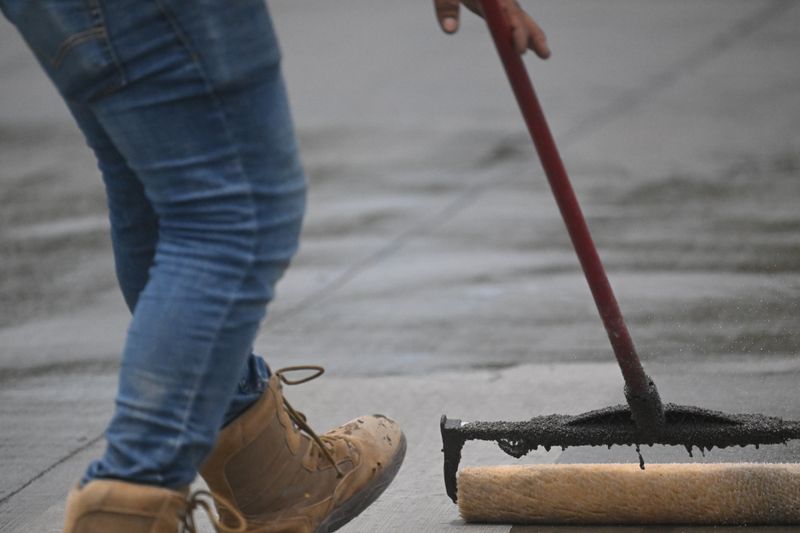
This is the entry-level option. You clean the concrete, patch any cracks, and roll on a waterproof paint, epoxy, or crystalline sealer. Costs stay under a few hundred dollars for most basements, and a weekend of work gets the job done.
The catch is that sealers only resist mild moisture. They cannot stop active leaks or beat hydrostatic pressure. If water is actively pushing in from below, a surface coating will blister and peel within a season or two.
Exterior Excavation And Membrane
This is the gold standard and the most expensive route. Crews dig down to the footing, clean the foundation, apply a rubberized membrane or dimple board, and install a perimeter drain before backfilling. Done right, it can last decades.
The downside is obvious. You are tearing up landscaping, driveways, and patios, and labor costs climb fast. For a full perimeter dig, five-figure bills are normal.
How To Waterproof A Floor From The Inside
Interior methods have become the most popular compromise for existing homes because they avoid the destruction of exterior digging, the removal of landscaping, and the disruption of driveways, patios, or decks that often sit directly against the foundation. If you are researching how to waterproof a basement floor without tearing up your yard, this is usually where the conversation lands. It is also the route most contractors will suggest first, since it can typically be completed in a few days rather than the weeks an exterior dig might require, and it keeps the mess contained to the basement itself.
The most effective interior system combines a perimeter drain channel cut into the slab, a sump pit with a reliable pump, and a vapor barrier along the walls. Water that pushes up through the floor is captured and routed to the pump instead of pooling on the surface. This approach does not stop water from entering the ground around your home, but it manages it before it causes damage. Think of it less as a shield and more as a controlled escape route: the hydrostatic pressure that would otherwise force moisture through cracks is relieved by giving that water the path of least resistance straight into the drainage channel. For many homeowners thinking about long-term home water protection, this trade-off between perfect prevention and reliable management is well worth it.
Key components of a solid interior drainage setup include:
- A perimeter channel or drain tile embedded along the inside footing, usually set in gravel and covered with a thin layer of new concrete
- A sump basin with a primary pump sized for your water volume, typically a 1/3 to 1/2 horsepower unit for average homes
- A battery backup pump for storm-related power outages, which is often when you need the system to work hardest
- A sealed sump lid to control humidity and radon, keeping the basement air cleaner and drier
- A dimple board or vapor barrier on walls to direct seepage down into the drain, rather than letting it evaporate into the living space
- Optional water alarms or Wi-Fi monitors that alert you by phone if the pump fails or the pit level climbs too high
Expect to pay several thousand dollars for a professional installation, with most full-perimeter systems in an average basement landing somewhere between four and nine thousand dollars depending on linear footage, pump quality, and backup options. It is still typically cheaper than exterior work, which can easily run two to three times as much once excavation and restoration are factored in. The system also lets you finish the basement with far more confidence than a surface sealer ever could, since any future seepage is quietly handled behind the walls instead of bubbling up through fresh drywall or ruining new flooring. For homeowners planning to add a bedroom, home office, or rental suite below grade, that peace of mind often justifies the investment on its own.
DIY Fixes Versus Hiring A Pro
Some basement problems genuinely are weekend projects. Others look simple and absolutely are not. Knowing the difference saves money and prevents the kind of damage that leads to insurance claims.
Most basements will eventually suffer water damage, and the average related insurance claims can cost thousands. That is a sobering reminder that cutting corners on home water protection usually costs more in the long run than doing it right the first time.
DIY makes sense when you are dealing with:
- Minor dampness or efflorescence on an otherwise dry floor
- Small, non-structural hairline cracks you can patch with hydraulic cement
- Gutter cleaning, downspout extensions, and regrading soil away from the house
- Applying a quality concrete sealer to a dry, prepped slab
- Running a dehumidifier to control ambient moisture
Call a professional when you see active water flowing in during storms, standing water on the floor, widening foundation cracks, bowing walls, or repeated failures of previous fixes. These signal structural or drainage issues that need engineered solutions, not another coat of paint. Being proactive about preventing home water damage before it escalates is always cheaper than remediation.
Cost Versus Long-Term Value
The sticker price of waterproofing is only half the story. The other half is what you avoid paying later. A finished basement destroyed by a single flood event can cost more than the entire waterproofing system would have.
Data from the Insurance Information Institute shows that the five-year average water damage and freezing claim between 2019 and 2023 reached $15,400, climbing from $13,954 in the previous five-year span. Numbers like that put a $5,000 drainage system in a very different light.
When comparing options, think in terms of cost per year of protection:
- A $300 sealer that fails in two years costs $150 per year and offers minimal protection
- A $6,000 interior drain system lasting 20 years comes out to $300 per year with far greater reliability
- A $15,000 exterior system lasting 30 years lands at $500 per year but handles the most severe conditions
The right choice depends on your water volume, how long you plan to stay in the home, and whether the basement is finished or will be. A dry crawl-style storage basement in a dry climate does not need the same investment as a finished family room in a wet region with clay soil.
Supporting Measures That Multiply Any Fix

Even the best drainage system works harder than it should if the rest of the house is not pulling its weight. A sump pump, interior drain, or sealed slab can only process what reaches it, and every gallon you keep away from the foundation in the first place is a gallon your primary system does not have to move. That is why a smart approach to home water protection treats the yard, the roofline, and the mechanical systems as part of the same team. A few supporting habits and upgrades stretch the life of whatever waterproofing method you choose, and most of them cost far less than a repeat repair.
- Extend downspouts at least six feet away from the foundation, further if the ground is flat or if the soil is slow-draining clay that holds water against the wall
- Re-slope soil so it drops at least six inches over the first ten feet from the wall, and top-dress with fresh fill every few years as settling eats into that grade
- Install window well covers to keep rain, leaves, and debris out of below-grade openings, and clear the gravel at the bottom of each well so it continues to drain
- Run a dehumidifier year-round in humid climates to keep relative humidity below 60 percent, which also protects stored belongings, drywall, and framing from mold
- Insulate cold water pipes to prevent condensation drips that mimic leaks and send homeowners chasing phantom foundation problems
- Inspect your sump pump twice a year, test the float switch with a bucket of water, and replace the backup battery on schedule before storm season hits
- Clean gutters at least twice a year, more often under heavy tree cover, since a single clogged section can dump hundreds of gallons right next to the wall during one storm
- Watch for cracks in driveways, patios, and walkways that slope toward the house, and seal or re-pitch them before they become funnels
None of these are glamorous, but together they reduce the load on your primary system and buy you early warning when something starts to drift out of spec. Think of them as the quiet background work that makes any plan for how to waterproof a basement floor actually hold up over a decade of weather, not just one dry season.
Conclusion
A dry basement is less about one heroic fix and more about layering sensible defenses. Start outside with grading and gutters, address the obvious entry points, then match your interior solution to the actual severity of the water problem you are seeing. Jumping straight to the most expensive option is just as wasteful as settling for a sealer that was never going to hold.
Take the time to diagnose before you spend. Watch where water appears during a hard rain, track whether it worsens with snowmelt, and note whether humidity alone is the issue versus active intrusion. Those observations tell you more than any product label will, and they help any contractor you hire give you a straight answer instead of an upsell.
Storms are not getting gentler, and soil around older foundations only gets more saturated as neighborhoods mature and drainage patterns shift. Treat your basement floor like the critical barrier it is, invest where it counts, and the next big downpour becomes something you sleep through instead of something you mop up.